
“Testing is an infinite process of comparing the invisible to the ambiguous in order to avoid the unthinkable happening to the anonymous.” – James Bach
Sanity Testing is the most commonly confused term in the field of Software testing. This article addresses the basic sanity testing checklist that helps you to feel confident that you haven’t missed any important aspect while doing a sanity check on your application.
By definition, Sanity Testing is performed wherein the aim is to verify if the new functionality, change, or fix is working and has not affected the existing functionalities.

To cut a long story short, sanity testing is a quick, broad, and shallow testing that is done to determine whether the application is reasonable to proceed with further testing.
How to do Sanity Testing?
Over other types of software testing, the main objective of sanity testing is to verify and validate the newly implemented features and that new features have not affected the functionality of the existing features in the application and also check the features that are associated with the new features. If this Sanity test fails, the Testing team need not proceed with further rigorous testing and can quickly send back the release to the developers for fixing the bugs. If the Sanity test passes, the release can proceed with further thorough testing.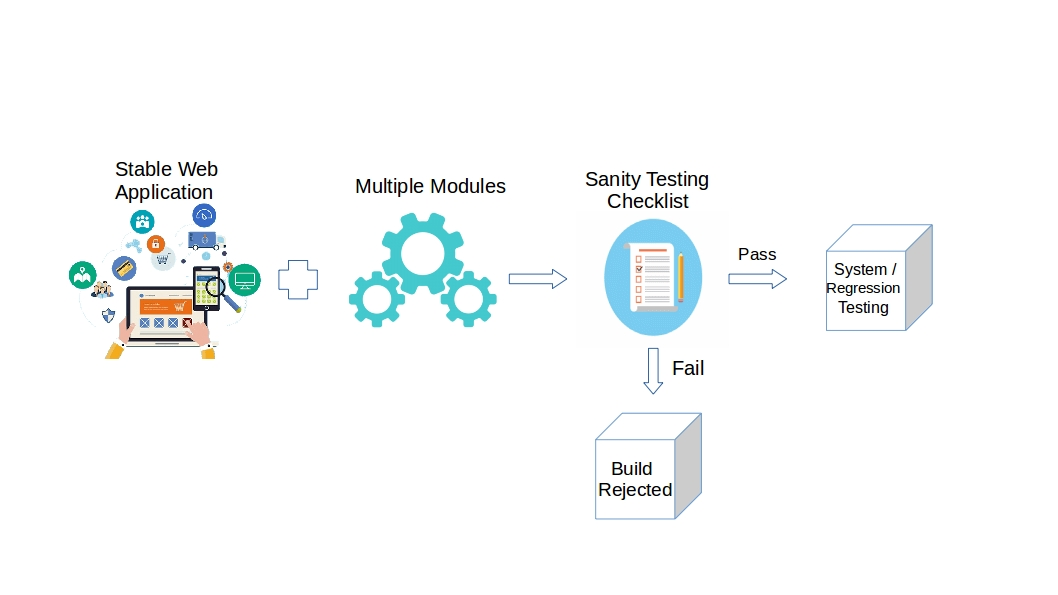 Here is a basic checklist that needs to be taken into account while doing a Sanity check for a software build.
UI Testing
User Interface Testing is to basically check the look & feel of the application. This includes,
- Check if font size/style/color is used as per the requirement
- Check for spelling and grammatical errors all over the website
- Check the alignment of texts, images, icons, buttons, etc are correct
- Check if breadcrumbs are displayed
- Check for mega menus
- Check for broken images and the image quality
- Check for Zoom in, Zoom out for Product images
- Check if the images don’t have any watermark
- Check if all the web elements are displayed correctly in all screen resolutions, browsers, and different platforms
- Check if scroll bars are visible wherever necessary
- Check if the links are distinguishable from normal text
- Check if error/warning/success messages are displayed correctly and distinguishable based on the color
- Check if the text field accepts characters or as based on the requirement
- Check if the autocomplete function is working correctly for a text field
- Check if a mandatory text field is identified by a * sign
- Check if the element focus is working
- Check if the tooltip is displayed correctly
Functional testing
The purpose of functional tests is to verify all features are functioning as per the requirement. This includes,
- Check field validations
- Check if a form is submitted after entering data from all the fields
- Check if documents such as PDF, DOC, XLXS are downloadable in different browsers and OS
- Check the search functionality
- Check sorting, filtering, and pagination functionality
- Check if the Product is added to the cart by clicking Add to Cart
- Check by adding multiple items to the cart
- Check if the Product price is displayed correctly in the cart
- Check by deleting/updating the product from PLP, PDP, Mini Cart, Shopping cart
- Check for Login functionality from the Login page, Cart page, and Checkout page
- Check the Create account functionality
- Check My Account module wherein the user is able to edit/update account information
- Check Forgot Password functionality
- Check Logout functionality
- Check Payment methods
- Check Tax Calculation
- Check Discount code functionality
- Check if the order is placed successfully
- Check for a confirmation message after placing an order
- Check Order processing.
Integration Testing
- Check for broken links
- Check if the social networking icons navigate to respective pages
- Check if the Logo is a clickable link and navigates to Home Page
To sum up, the above-mentioned checklist provides a quick evaluation of the quality of the software and in turn saves a lot of time and effort a tester puts in to make a decision beforehand whether to proceed with rigorous testing or give back the build to the developers. I hope this article is useful. Happy Testing!!

Sanity Testing Checklist For Your Software Build