We are pleased to announce to our community that QA Touch is now integrated with OKTA SSO.
Single Sign-On is a property of user identity and system access management. This enables the user to authenticate and access multiple systems with a single ID. The Okta Authentication API provides operations to authenticate users, perform multi-factor enrollment and verification, recover forgotten passwords, and unlock accounts.
We have an array of other integrations JIRA, JIRA Server, Slack, GitHub, GitLab, Bitbucket, Trello, Assembla, Bugzilla, QA Touch API, Youtrack, Redmine
We need to create an Okta developer account to create an application setup specific to your QA Touch domain. After activating the developer account, login in the newly created developer account and create Application in the below URL: https://developer.okta.com/.
The steps to integrate with SSO are as follows:
- How to Create an OKTA SSO Client Credentials.
- Mapping the Credential detail to QA Touch
How to create an OKTA SSO Client Credentials
The steps to create an application are mentioned below
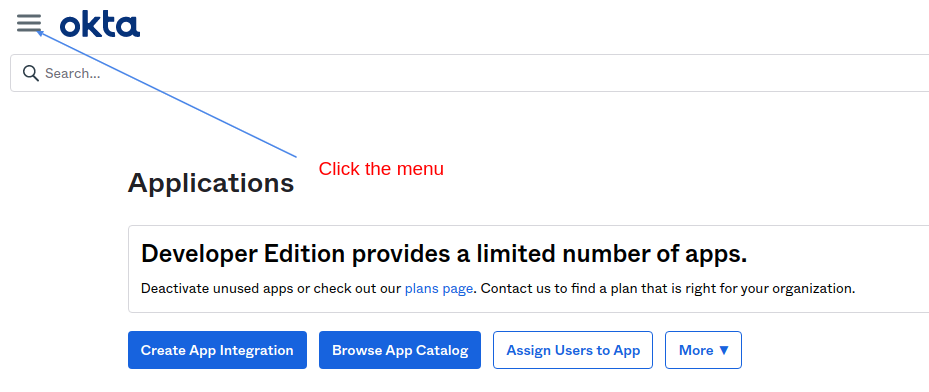
- Login to OKTA developer account.
- Click the Sidebar menu in the top section.
- From Sidebar Menu, Go to Applications->Application
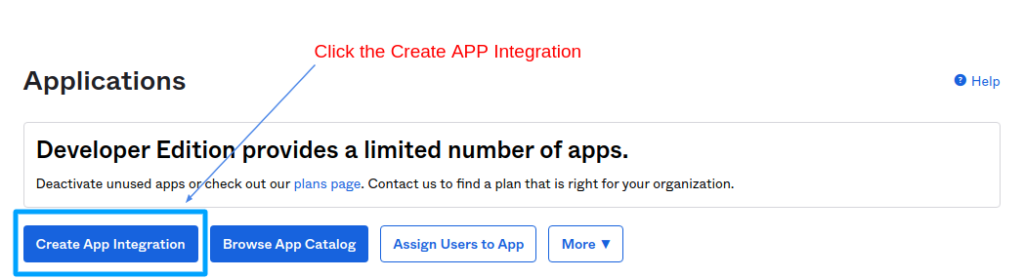
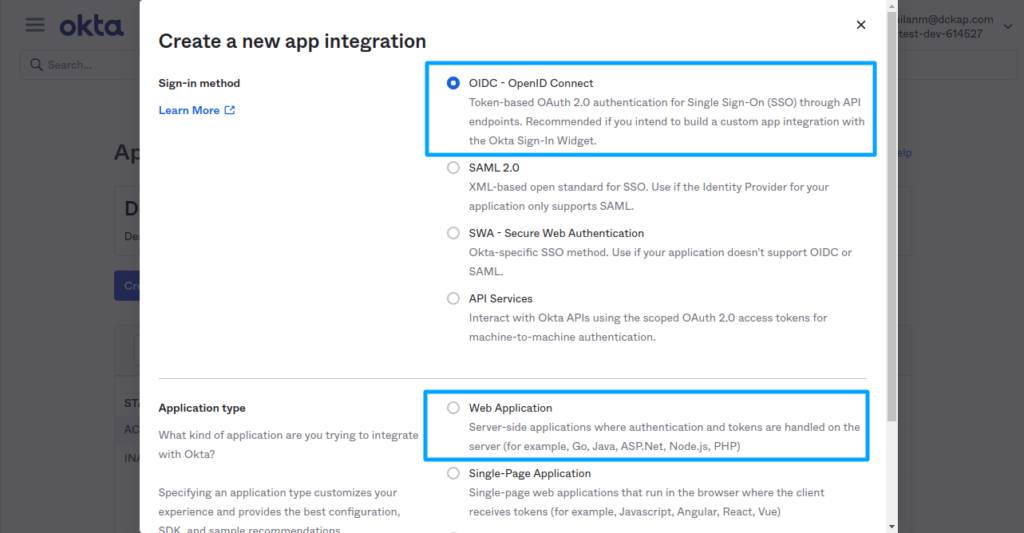
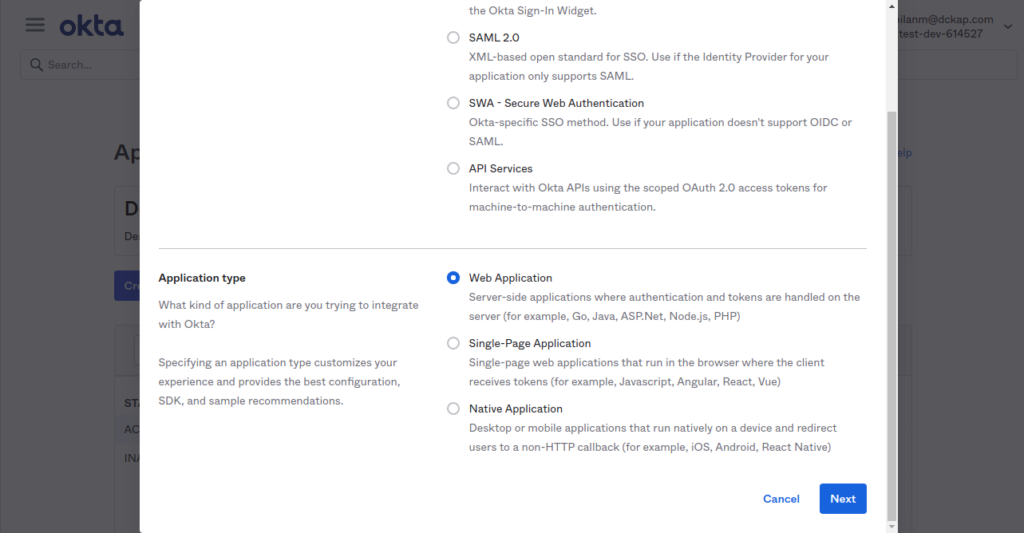
- Click on “Create App Integration”. Then select the “OIDC – OpenID Connect” and application type as “Web Application” and click the next button.
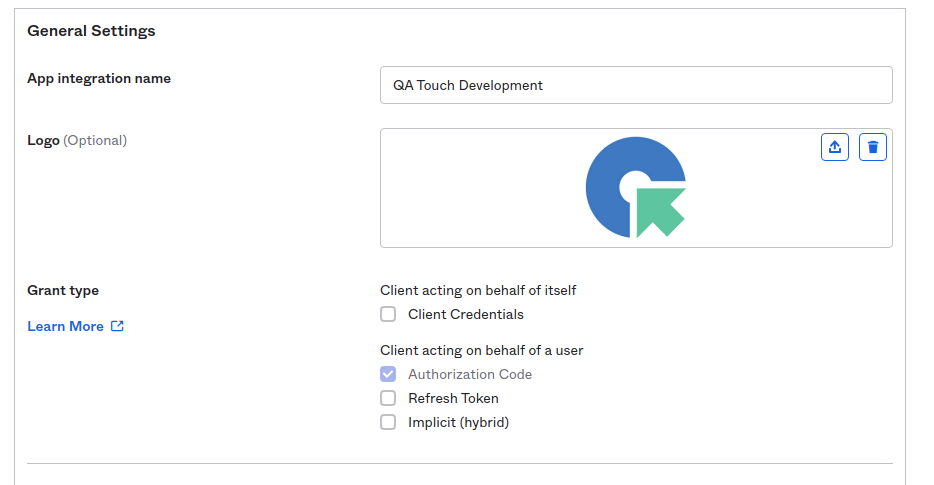
- The page is redirected to “Application Setting”, we need to fill the form detail.
- Base URL : https://(xxxx).qatouch.com/
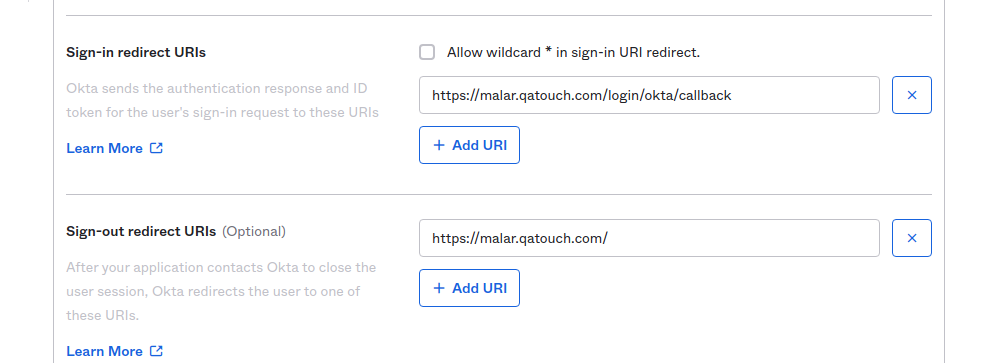
- Please enter login redirect URL as per below : https://(xxxx).qatouch.com/login/okta/callback
- Logout : https://(xxxx).qatouch.com/
- Group assignments: Everyone
- Grant type allowed: Authorization Code (Please Select)
- Note : (xxxx) is your qatouch domain.
- In the final step, click the Done button.
The below snapshots show the steps to access the avatar.

Sign-in redirect URIs https://YOURDOMAIN.qatouch.com/login/okta/callback
Sign-out redirect URIs https://YOURDOMAIN.qatouch.com/
Base URIs https://YOURDOMAIN.qatouch.com/

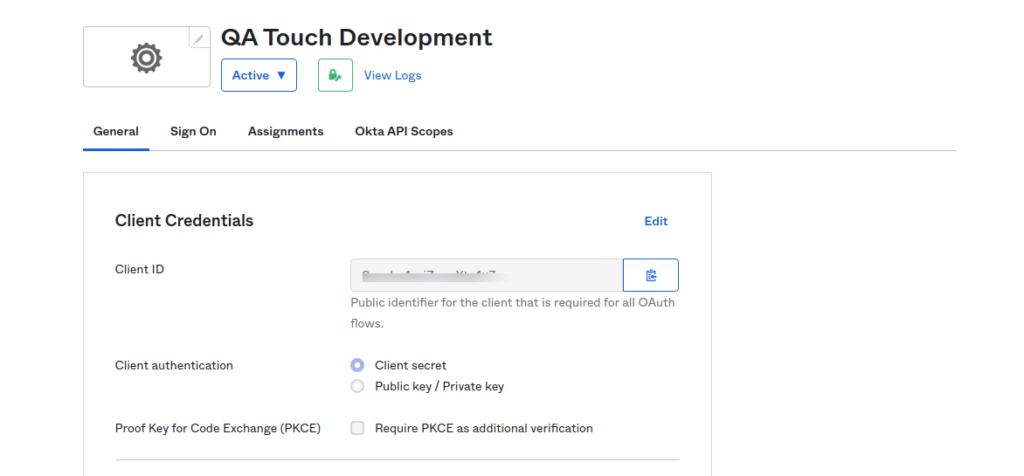
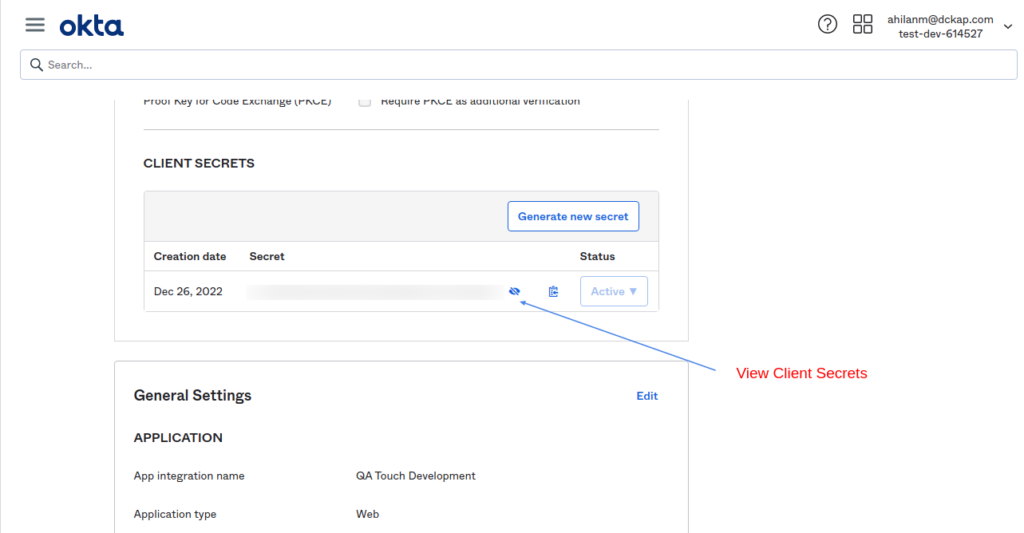
After Successful Application creation. Get Client Id and Client secret
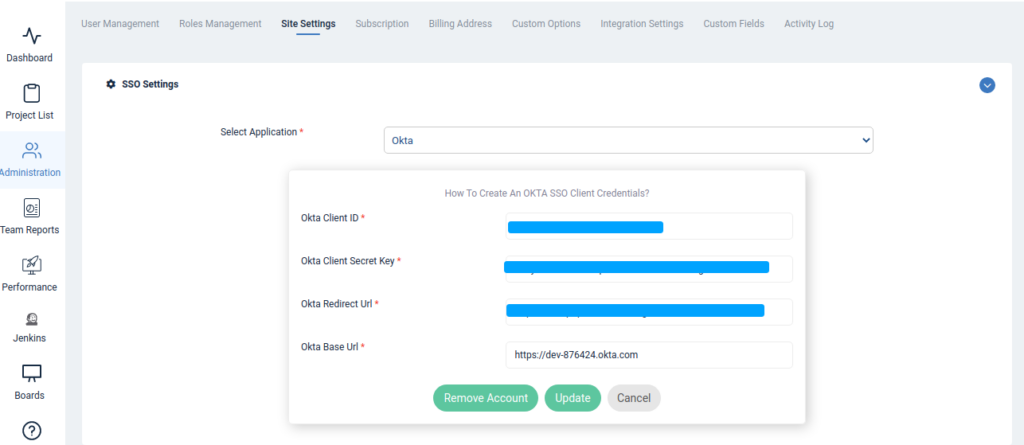
Mapping the Client Credential detail to QA Touch
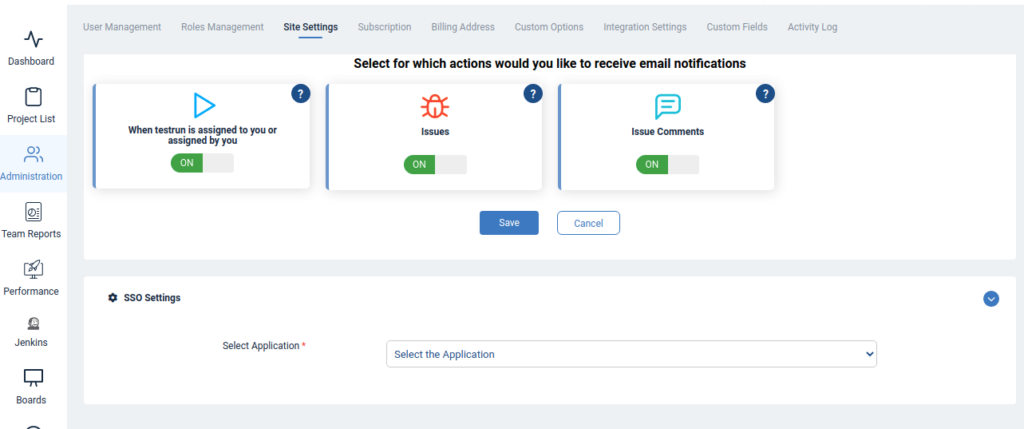
- Login to QA Touch as an Administrator.
- Click the Administration → Site setting → SSO Setting.
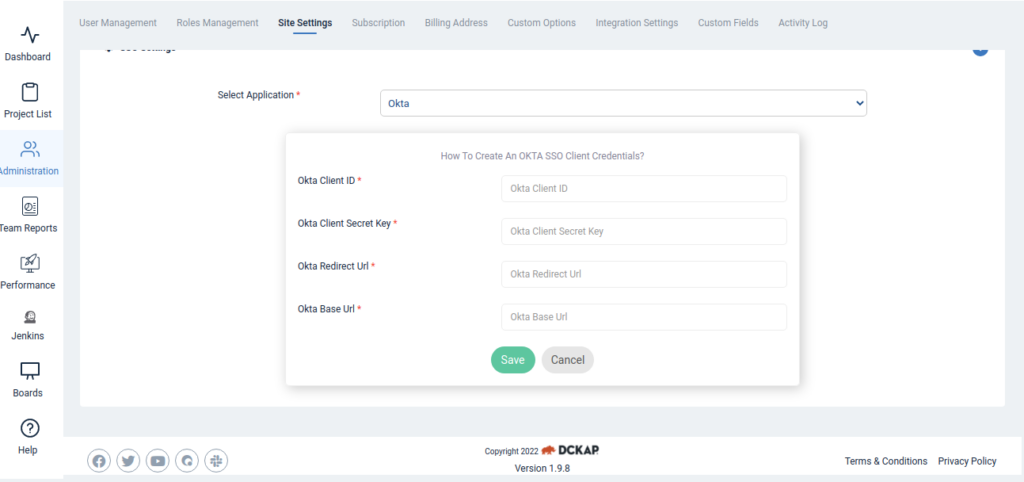
- Please select the OKTA in the dropdown
- Enter OKTA Client ID, Client Secret Key,
- OKTA Base URL – Please enter your OKTA domain URL. Example https://xxxxxxxx.okta.com
- Click the Submit button.
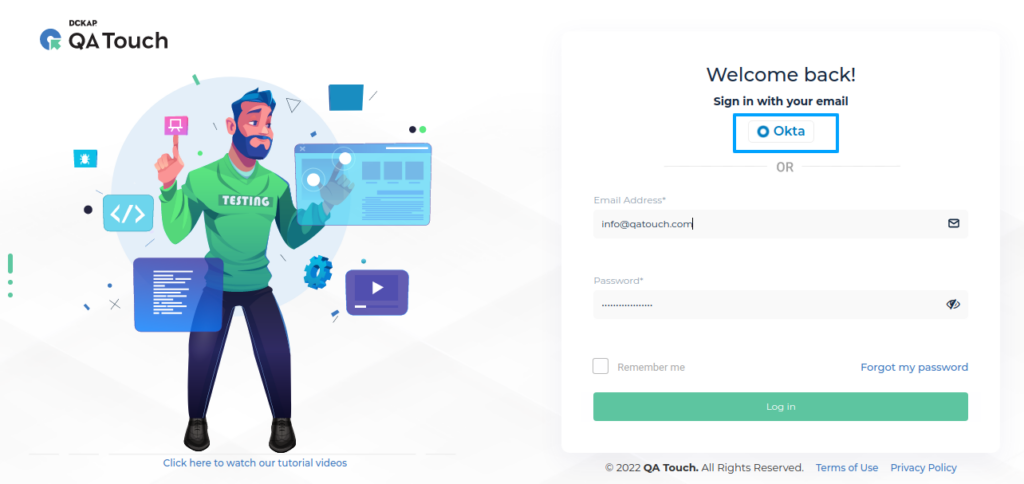
- After a successful configuration, the OKTA login button visible in the QA Touch login page.
OKTA Base URL –
- Click on your profile (your Email in Top Right corner)
- Copy the OKTA Base URL in the second line
Administration → Site Setting Navigation


After successful configuration, the status becomes connected
We hope this blog helped you to understand how to create OKTA client application details and mapped to QA Touch.
Start your 14-day free trial and be the master of your application testing.
Integration with 10+ Defect Management Tool. Quick API Integrations & No Coding Required
Get QA Touch for Free