This blog guides users on how to set up roles and permissions for their team members in QA Touch.
The Importance of Setting up Roles and Permissions
Any IT firm or an organization with a technical team has a combination of Team Leads, Managers, Senior Testers & Testers. As such, the user roles & permissions for the Test Management tool depends on the hierarchy. It’s a known fact that a good test case and team management heavily relies on security, and for these reasons, the Team Leads and Managers hold complete access while the testers are given a restricted access.
Likewise, QA Touch‘s Test Management tool allows user to set up roles and permissions based on an organization’s need.
How To Set up Roles and Permissions?
For setting up Roles and Permissions, the below steps need to be followed:
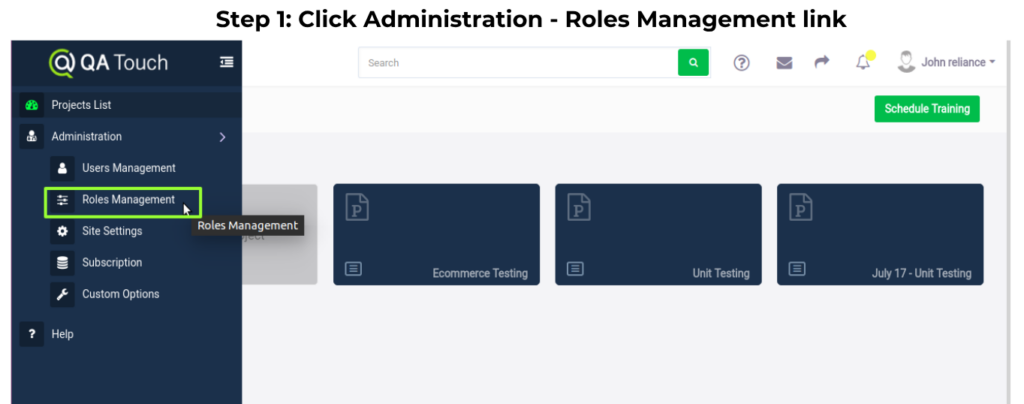
Step 1: Click Administration & Go To Roles Management link. Check the snapshot shared below.
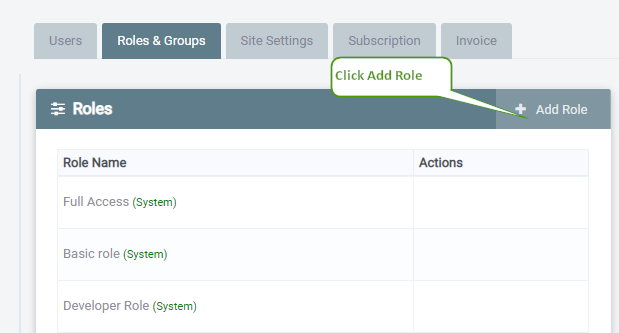
Step 2. In the result page, Click – Add Role.
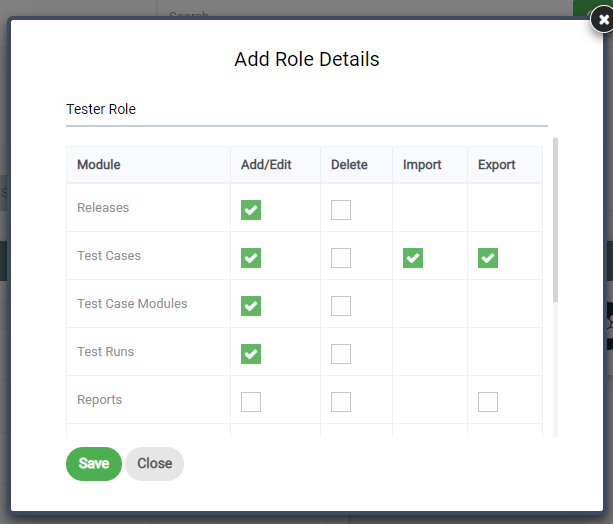
Step 3 : User can Add Role here. For example, add a role as Tester Role and configure the required permissions and click Save.
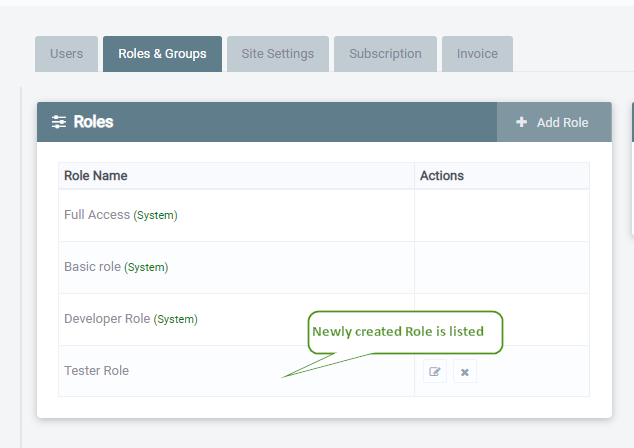
Step 4: After you save the action made, the newly created role will be listed as shown below.
Step 5: Click “Quick” button in Projects Dashboard

Step 6: Select Users & Roles in Quick menu.

Step 7: Assign Users & Roles in the Project
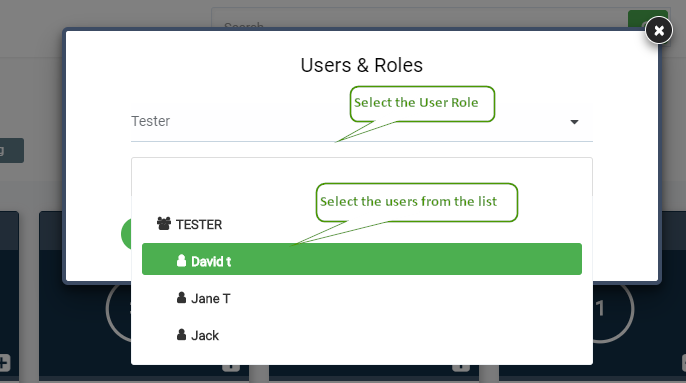
Step 8: Click Save.
Step 9: Access Quick Menu & Click menu drop down.
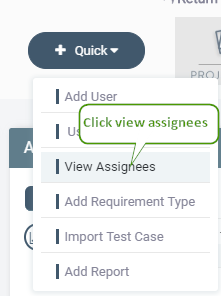
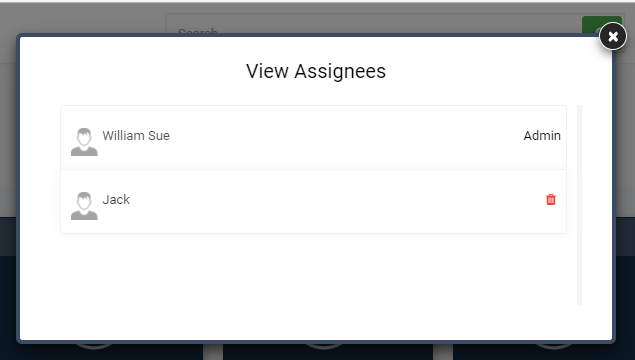
Step 10: Click View Assignee of the project from Quick Menu drop down and you will be able to see the assignee of the project.
Hope the procedure turned out to be useful. A ton of know-how articles like this are down the pipeline and do stay subscribed to get notified about those.
Drop us a line, and we’d be happy to keep on improving QA touch with your suggestions and feedback.


