We are pleased to announce to our community that QA Touch is now integrated with Microsoft Azure Active Directory SSO.
The steps to integrate with SSO are as follows:
- How to Create Microsoft Azure SSO API Client Credentials.
- Mapping the Credential detail to QA Touch
How To Create Microsoft Azure SSO Client Credentials
The steps to create an application are mentioned below
- Please login to the Microsoft Azure portal
- Login to your Microsoft Azure account and click on Microsoft Entra ID.
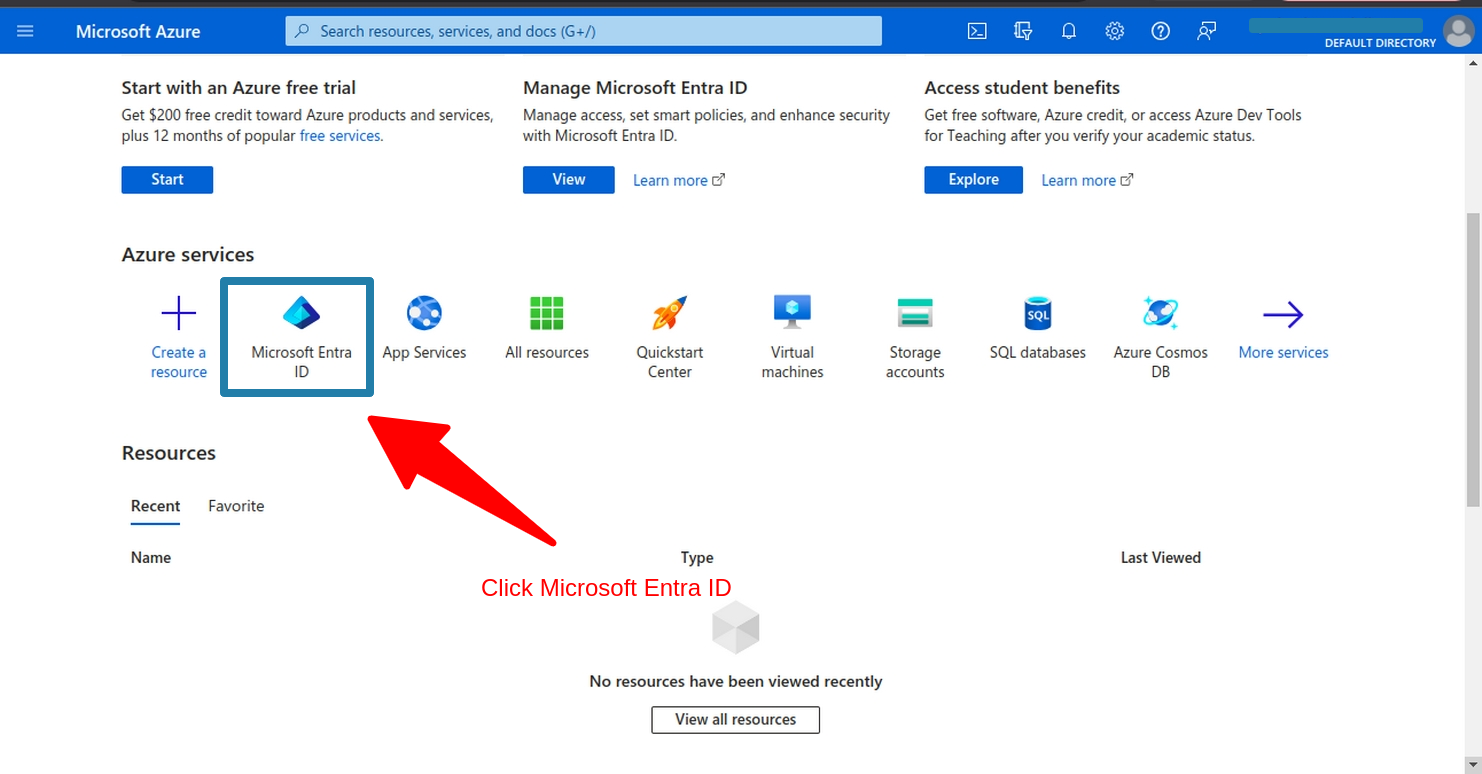
- We will redirect to the Overview page. See the Sidebar menu on the Overview Page, and click on App Registrations.

- Select All applications.
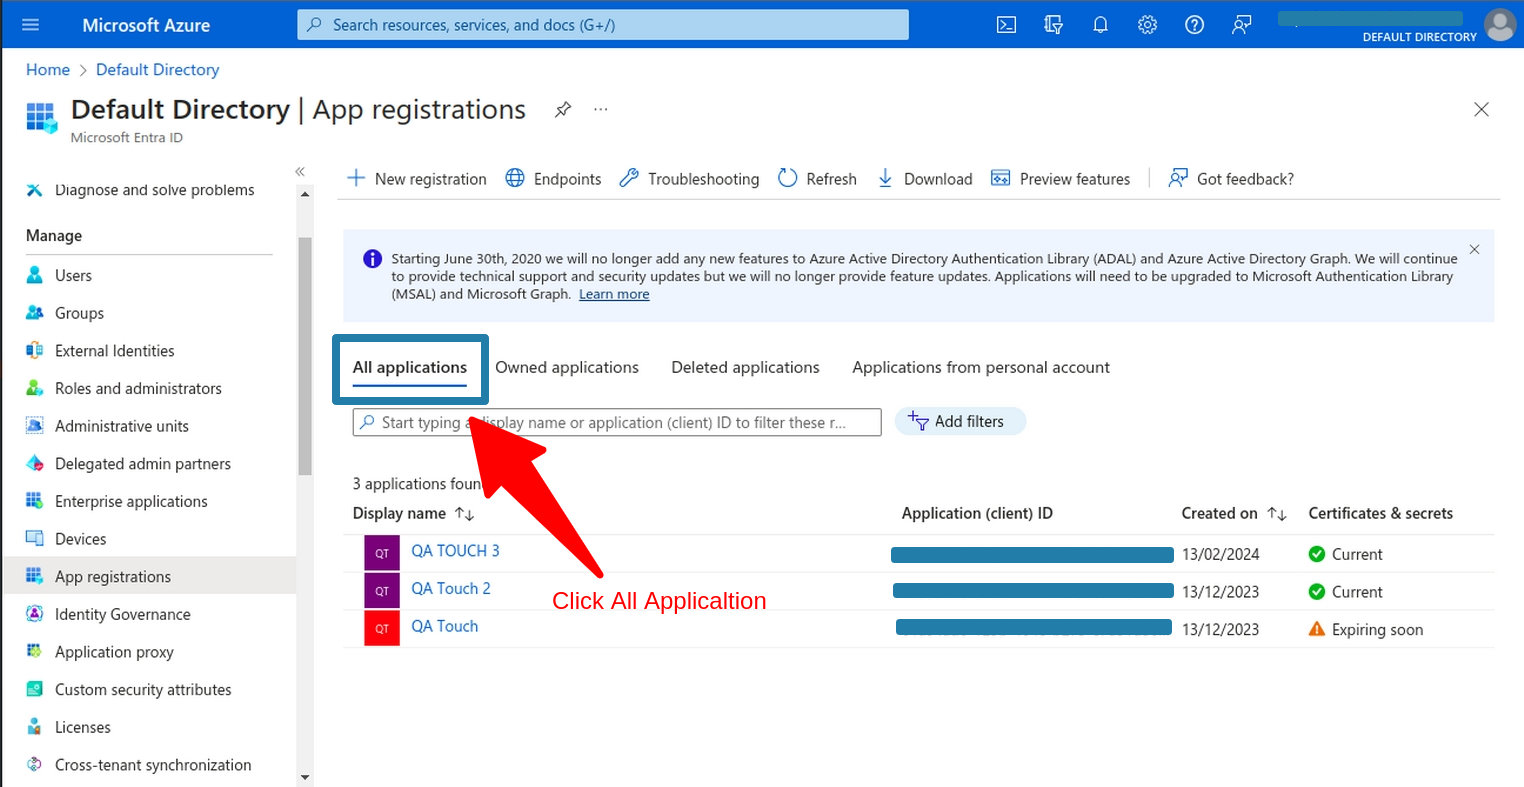
- Click on New Registration
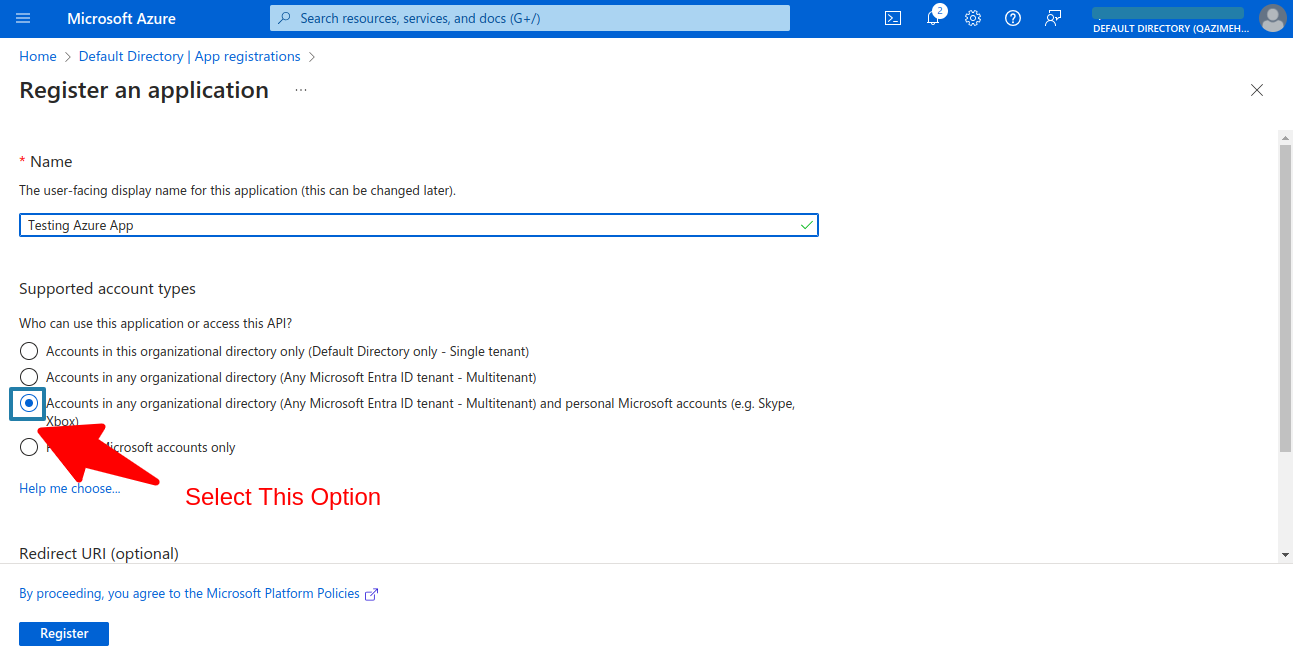
- Enter the name of the app and then select the option for supported account types, as displayed in the image below. Upon scrolling down, you will find the Redirect URL address field with the option to select ‘Web’.
Please select the first option, Single Tenant
Redirect URL: https://yourdomainname.qatouch.com/login/azure/callback
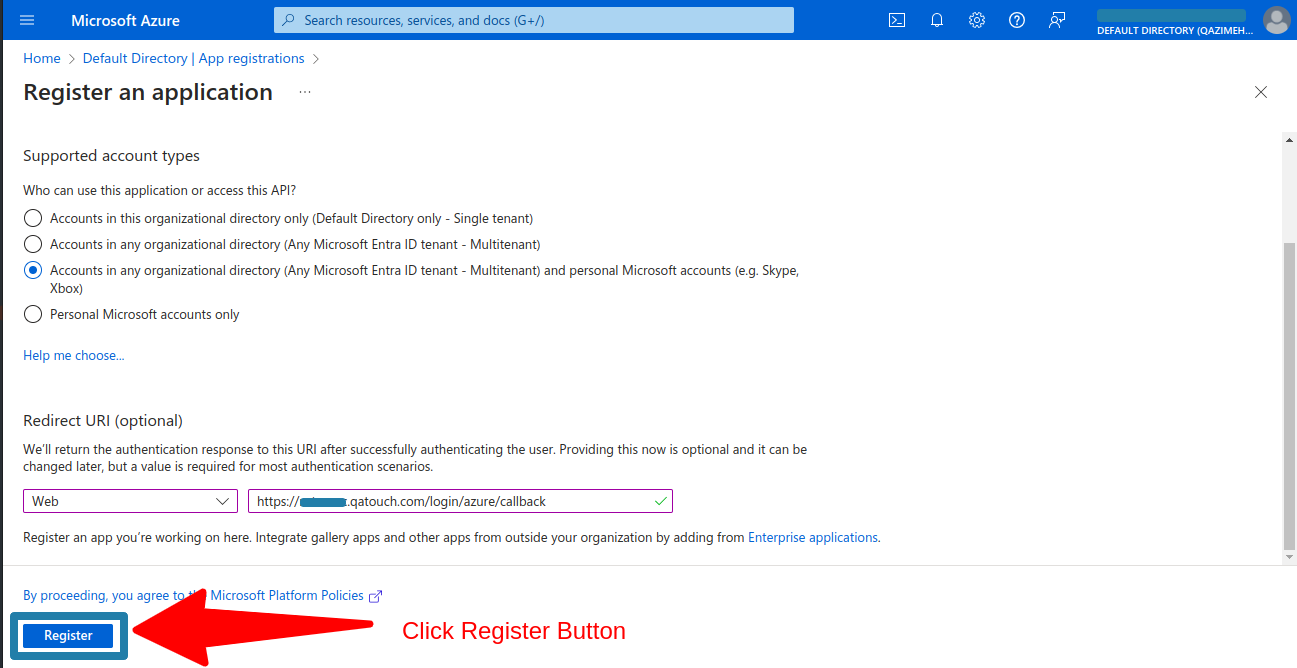
- After completing the application form, click the ‘Register’ button, which will redirect you to the App Overview page. Upon redirection, you will land on your application’s overview page, where you can find the application Client ID and Tenant ID. To generate a secret key, navigate to the ‘Add a certificate or secret’ link on the overview page.
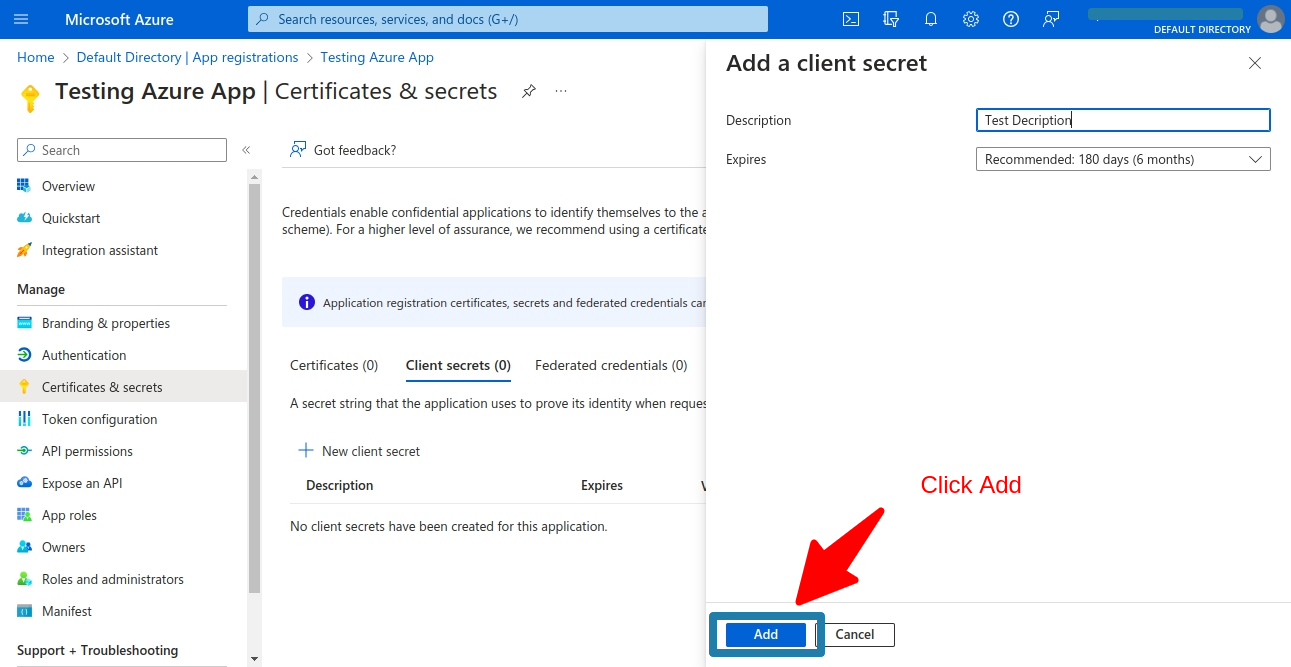
- Redirected to the Certificates & Secrets page, where you can create a client secret key according to your specified requirements. Click on ‘Client Secrets,’ then select ‘New Client Secret’ to proceed.
- A side overlay will appear where you can add a description and select the expiration time of the key. Click the ‘Add’ button to create the key. Copy the value from the ‘Value’ column and store it securely, as this is your App Secret Key. After some time, the full key will be displayed.
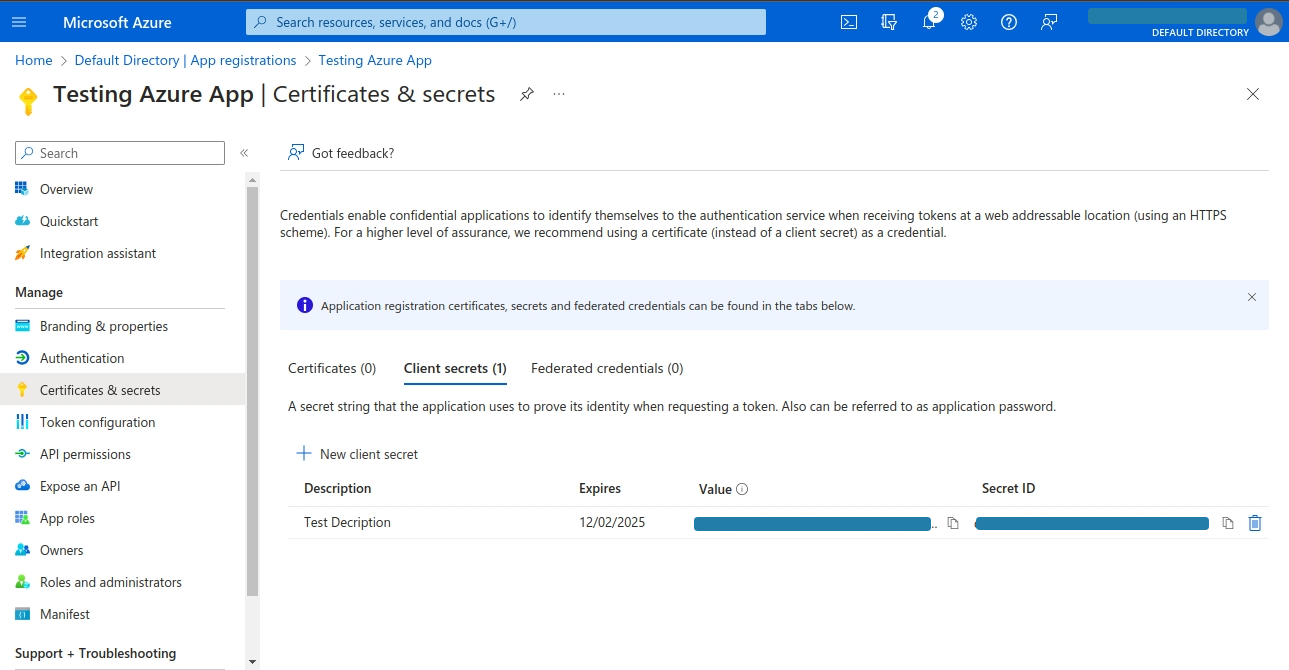
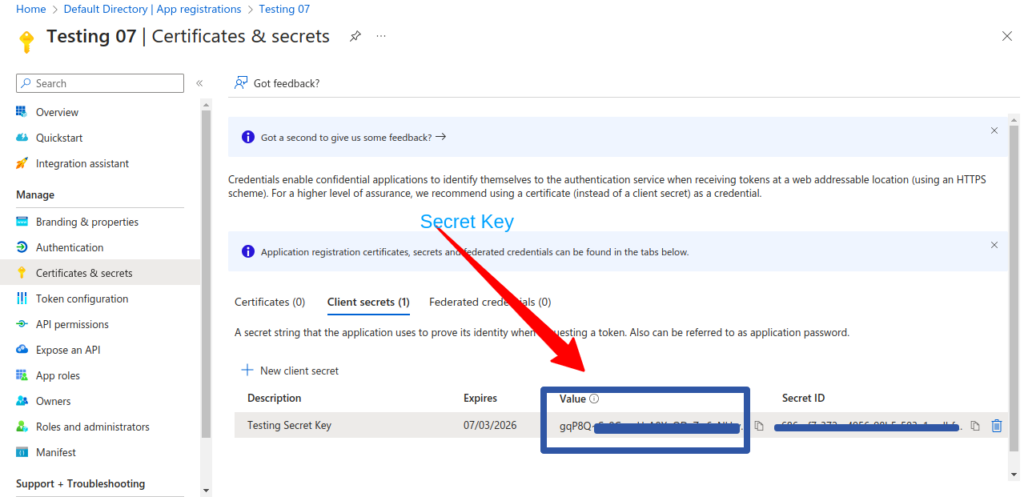
Finally, We got the Client ID, Client Secret Key, and Tenant ID.
Mapping the Credential detail to QA Touch
- Login to QA Touch as an Administrator.
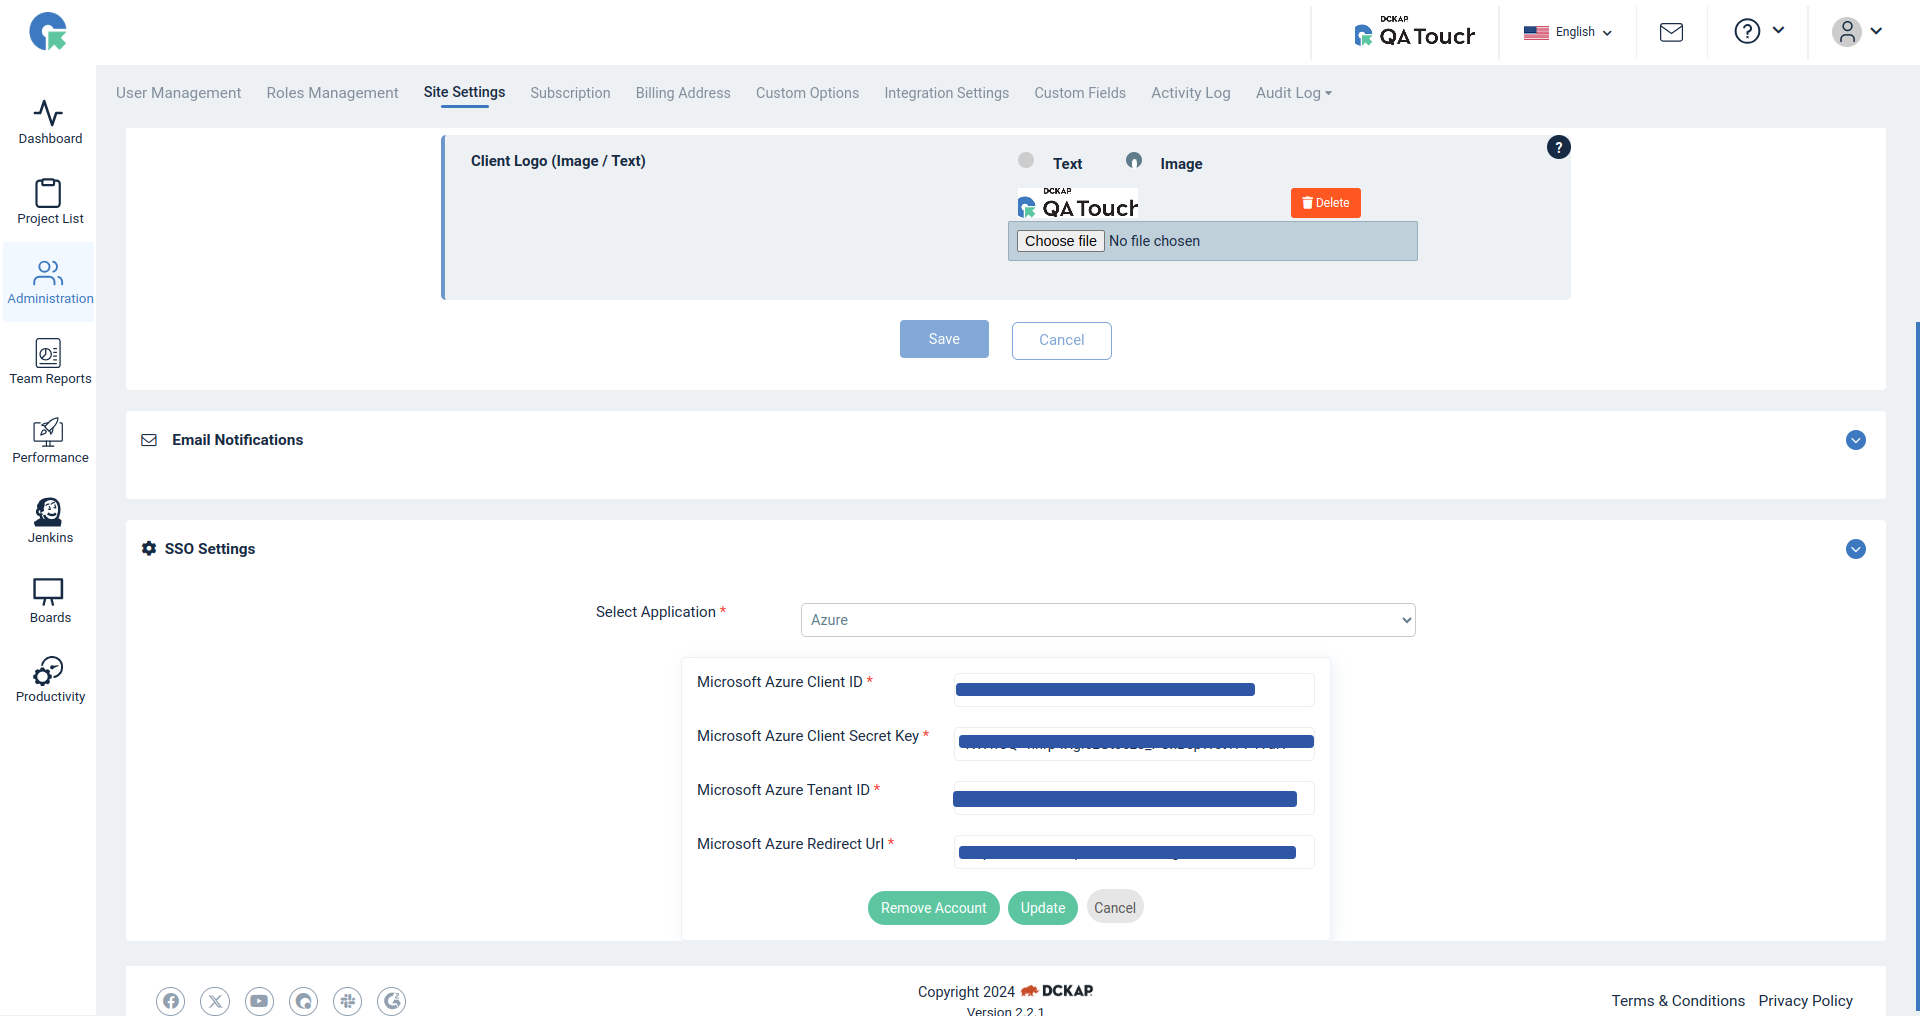
- Click the Administration → Site setting → SSO Setting.
- Please select Azure in the dropdown
- Enter Microsoft Azure Client ID, Microsoft Azure Client Secret Key, Microsoft Azure Tenant ID
- Microsoft Azure Redirect Url URL – Automatically fetched call back URL
- Click the Submit button.
- After a successful configuration, the Azure login button is visible on the QA Touch login page.
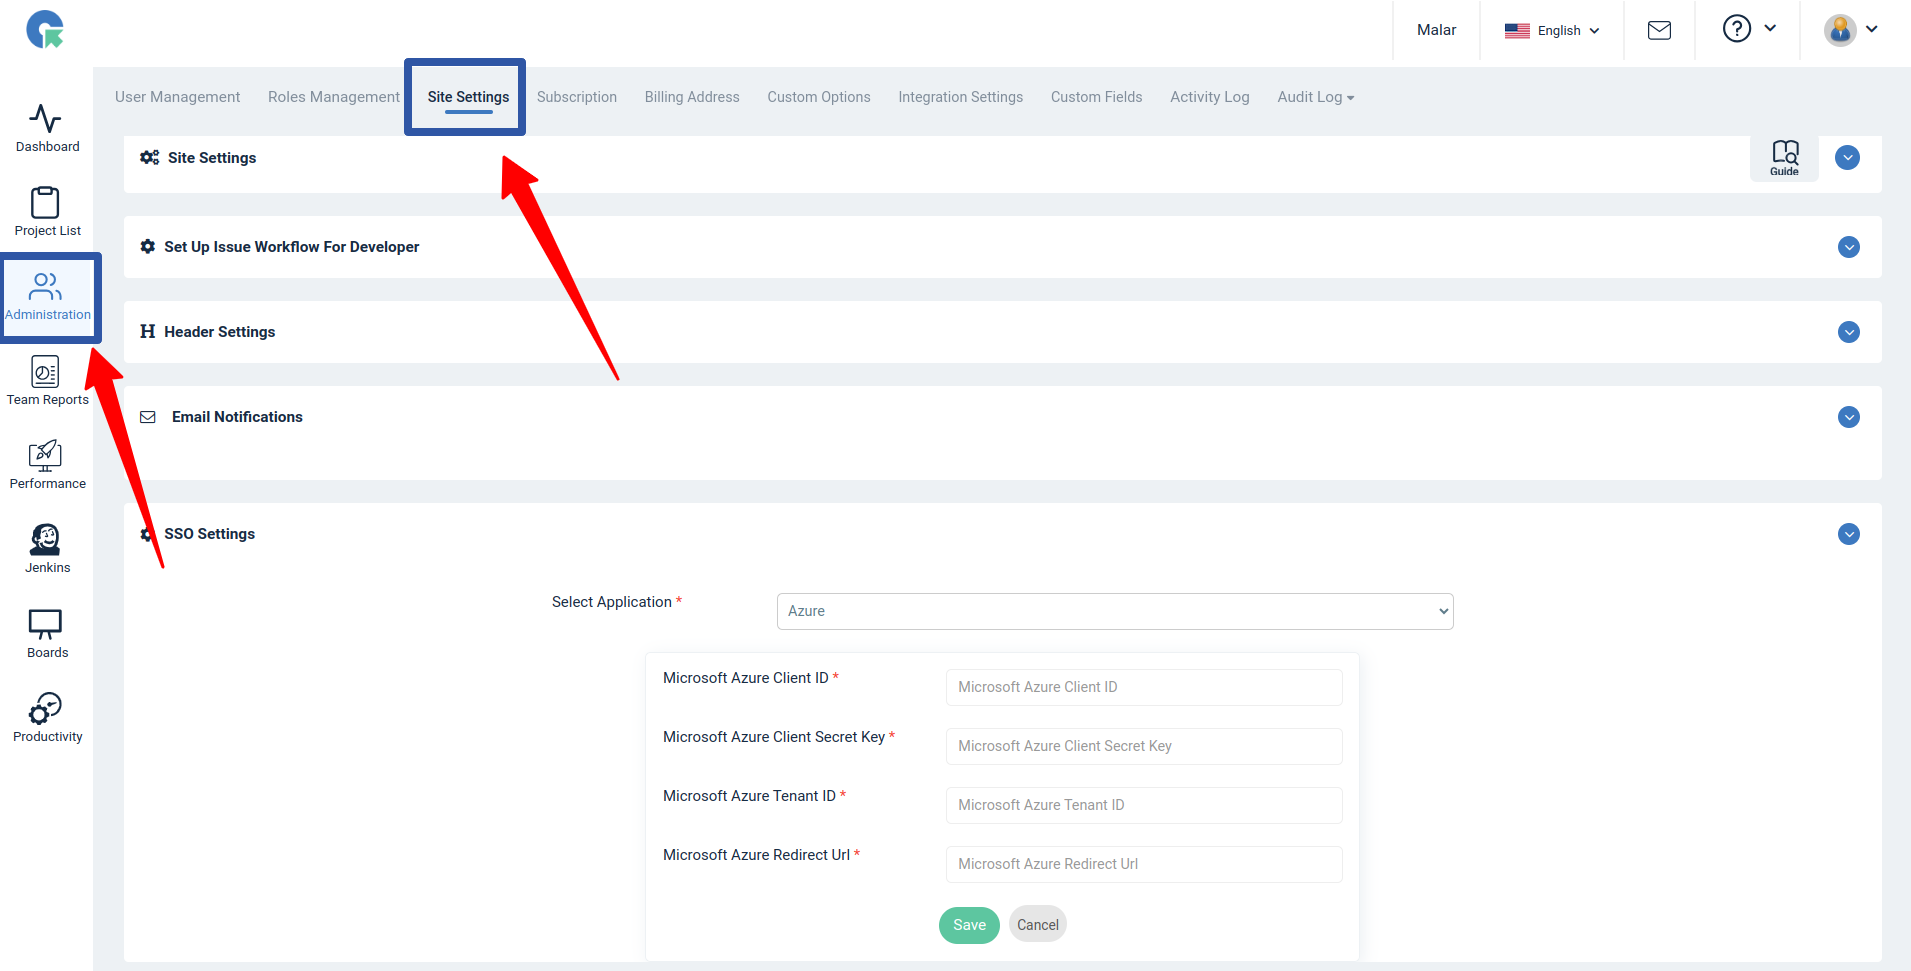 Administration → Site Setting Navigation
After successful configuration, the status becomes connected. Please check the login page Azure SSO button will be visible.

Click the Azure button it will redirect to the Microsoft login page.
We hope this blog helped you to understand how to create Microsoft Azure client application details and map them to QA Touch.
Register here and be the master of your application testing.