How to Implement Playwright Test Cases Using GitHub Actions
This blog post discussed the process of running Playwright Test Cases within GitHub Actions.
Playwright:
Playwright serves as a software testing tool designed for testing web applications. It facilitates script writing in various programming languages, including Python, Java, JavaScript, and C#. Notably, it supports multiple browser engines, enabling the execution of scripts on browsers like Chromium, Firefox, and WebKit. This automation capability proves valuable for testing web pages in terms of functionality, performance, and reliability. With Playwright, you can automate a range of browser actions, such as clicking buttons, filling forms, navigating through pages, and even capturing screenshots or videos to document your interactions. Beyond mere automation, Playwright stands out as a robust tool for thoroughly testing and validating your web applications.
Playwright Installation :
- Check if Node.js and NPM are installed using `node -v` and `npm -v` in the terminal.
Note: The version of Node should be 14 or higher
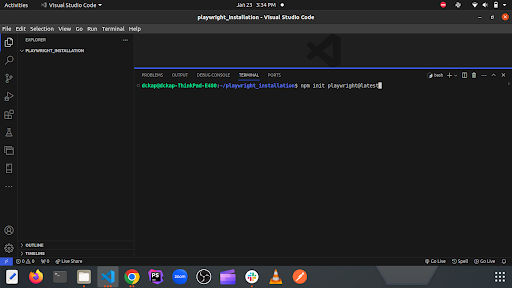
- Open a terminal in your project directory.
- Install playwright using the command `npm init playwright@latest`.
- Choose TypeScript or JavaScript (recommended to choose Javascript).
- Name your Tests folder as you want.
- Add a GitHub Actions workflow
- Install Playwright browsers
- Install Playwright operating system dependencies
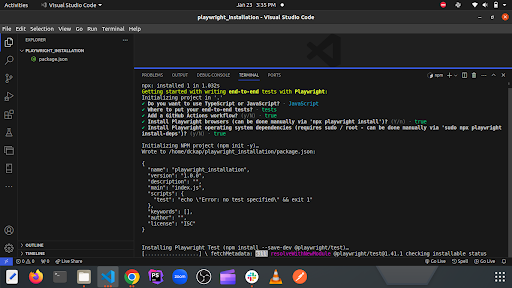
- Now Playwright is installed successfully
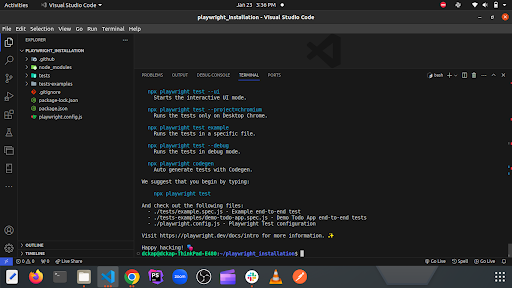
- Now open the example.spec.js file in the tests folder.
- Then understand the code and run the test scripts in the terminal by using any one of these commands `npx playwright test tests/example.spec.js
| npx playwright test example`.
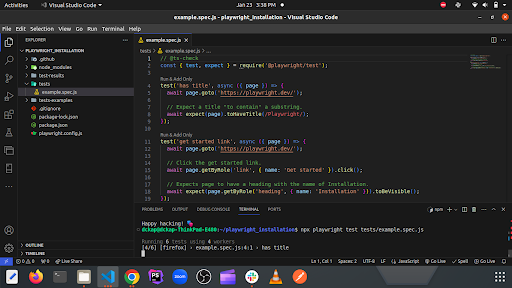
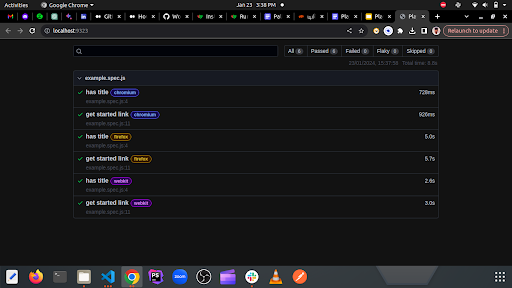
- After completing the test, see the report in the browser by running the `npx playwright show-report` command in the terminal.
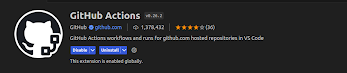
- Recommended to install the “GitHub Actions” extension in VS Code, that should be verified by GitHub.
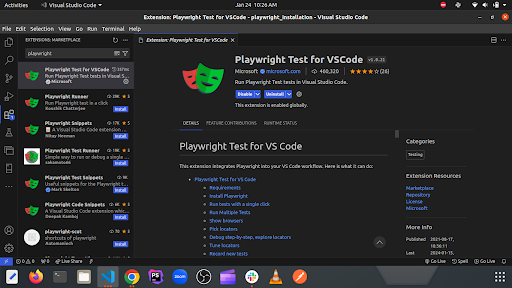
Playwright Installations through VS Code extension:
- Open VS code editor
- Go to the extension tab and search for playwright
- Select and install the “Playwright Test for VSCode” extension and that should be verified by Microsoft.
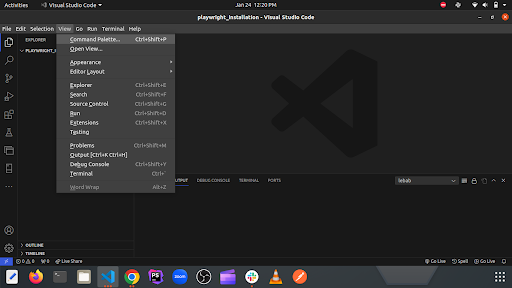
- Now go to the Explorer tab and click the “View” button on the top-left navigation bar, then select the “Command Palette” option or click “Ctrl+Shift+P”.
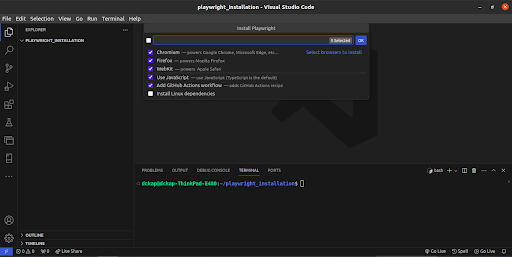
- After that, make sure that you can able to see the search area in VS code editor, and again search for “Playwright”.

- Click the “Install Playwright” option and choose the requirements that you want, and click on the “OK” button.
- Note: If you encountering any challenges during the installation process, I recommend you to run this command `npm init playwright@latest –yes — –quiet –browser=chromium –browser=firefox –browser=webkit –lang=js –gha` in terminal.
- Recommended to install the “GitHub Actions” extension in VS Code, that should be verified by GitHub.

- Now, as usual you can write and run the test scripts.
Playwright GitHub Actions:
GitHub Actions stands out as an automation platform provided by GitHub, aiming to simplify software development workflows. This platform empowers developers and QA engineers by allowing the automation of diverse tasks within their development processes. Moreover, it facilitates the creation of tailored workflows triggered by specific events like code pushes, pull requests, or issue creation. These workflows play a pivotal role in automating crucial tasks such as application building, test execution, and code deployment. GitHub Actions serves as a seamless solution, enabling developers to automate different facets of the software development lifecycle directly from their GitHub repository.
Get Started with Playwright Github Action:
Step 1
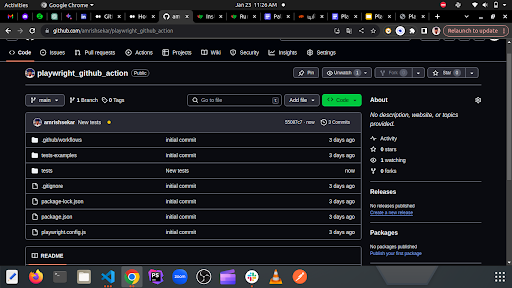
Create a repository named “playwright_github_action”. Initially, there is no code.
Example 1
In the below code, I have written a test to
- Open the URL https://github.com/
- Verify the title.
- Logging in and moving to your profile, and
- Changing your `user_profile_name` in your account and saving it.
CODE~
import { test, expect } from ‘@playwright/test’
test(‘Github’, async({ page }) => {
await page.goto(‘https://github.com/’);
await expect(page).toHaveTitle(‘GitHub: Let’s build from here · GitHub’);
await page.getByRole(‘link’, { name: ‘Sign in’ }).click();
await page.locator(‘#login_field’).fill(‘YOUR_USER_NAME’);
await page.fill(‘#password’, YOUR_PASSWORD’);
await page.click(“input[value=’Sign in’]”);
await page.click(‘span.Button-label > img.avatar’);
await page.waitForTimeout(2000);
await page.getByText(“Your profile”).click();
await page.getByText(“Edit profile”).click();
await page.waitForTimeout(2000);
await page.fill(“#user_profile_name”, “YOUR_PROFILE_NAME”);
await page.click(‘span.Button-label:has-text(“Save”)’);
await page.waitForTimeout(2000);
});

Example 2
In the below code, I have written a test to
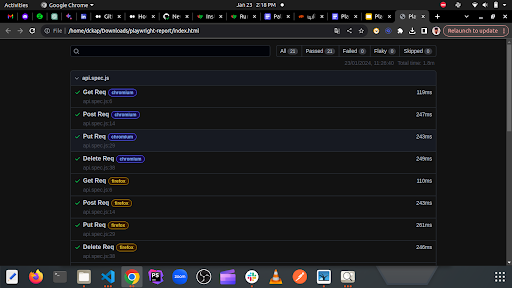
- Do API testing with GET, POST, PUT, and DELETE requests in https://reqres.in/api/users
- GET request with Valid 200 Response
- POST request with Valid 201 Response
- PUT request with Valid 404 Response (For a successful update request (PUT) in HTTP, a common response is 200 OK or 204 No Content, depending on the API. A 200 OK means the update was successful, and the server provides the updated resource. A 204 No Content indicates success without additional response data. Note that API documentation specifies the exact status codes. If expecting a 404, it suggests the resource might not exist or the endpoint doesn’t support PUT; ensure the API aligns with your expectations.)
- DELETE request with Valid 204 Response
CODE~
import { test, expect } from “@playwright/test”;
// Using this variable globally we want
var userId;
test(‘Get Req’, async({ request }) => {
// GET request to fetch data
const get_response = await request.get(“https://reqres.in/api/users?page=2”);
console.log(await get_response.json());
// expecting the respective status of the request
expect(get_response.status()).toBe(200);
});
test(‘Post Req’, async({ request }) => {
// POST request to add data
const post_response = await request.post(“https://reqres.in/api/users”, {
data: { “name”: “Amrish S”, “job”: “Tester” },
headers: { “Accept”: “application/json” }
});
// Storing the response in a variable
const result = await post_response.json();
console.log(result);
// expecting the respective status of the request
expect(post_response.status()).toBe(201);
// assigning the result’s `id` in variable -> `userId`. Purpose:`To update and delete the particular user in API`
userId = result.id;
});
test(‘Put Req’, async({ request }) => {
const put_response = await request.put(“https://reqres.in/api/users” + userId, {
data: { “name”: “Amrish Sekar”, “job”: “Developer” },
headers: { “Accept”: “application/json” }
});
// Log the raw response content
console.log(await put_response.text());
// expecting the respective status of the request
expect(put_response.status()).toBe(404);
});
test(‘Delete Req’, async({ request }) => {
// DELETE request to terminate the data
const delete_response = await request.delete(“https://reqres.in/api/users” + userId);
// expecting the respective status of the request
expect(delete_response.status()).toBe(204);
});
Step 2
- After writing the test scripts, simply commit the code by this command `git commit -m “New tests”`, and push the code into the newly created repo.
Step 3
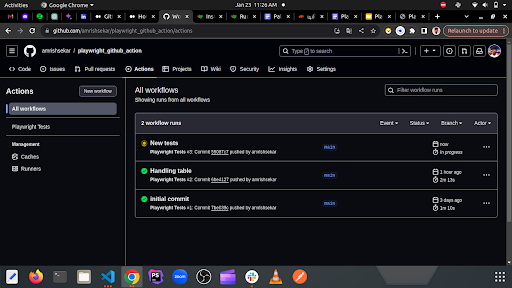
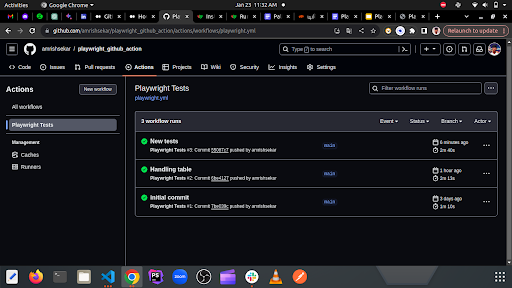
- And then click on the ‘Actions’ tab in the repo. In this tab, our committed tests are running here. Simply click on the “New tests”.
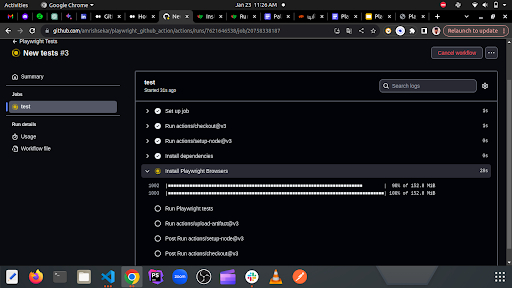
- The page will show like the image below after clicking the ‘New tests’ section. Then click on the “test” box in the middle of the page.

- After clicking the ‘test’ box, It shows that all tests are running step by step. These are the steps running on the test.
- Set up job
- Run actions/checkout@v3
- Run actions/setup-node@v3
- Install dependencies
- Install Playwright Browers
- Run Playwright tests
- Run actions/upload-artifact@v3
- Post Run actions/setup-node@v3
- Post Run actions/checkout@v3
- Complete job
Step 4
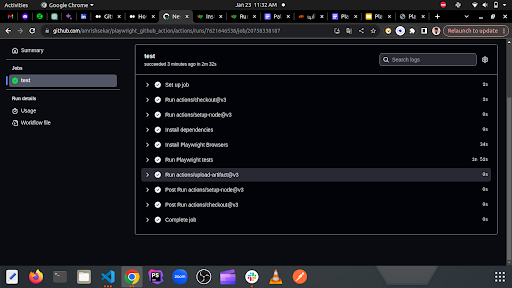
- Now, Get back to the Actions tab. If the test is failed, you’ll see an error message. If it passes, a green checkmark will be displayed like the image below.
Step 5
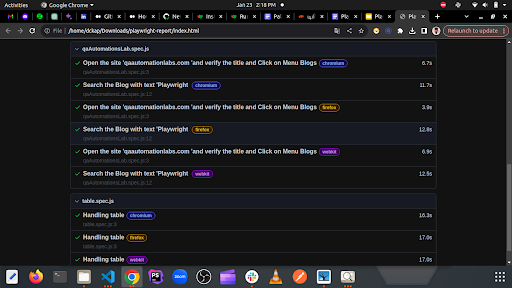
- Again get into the “New tests” section, and click the “playwright-report” button at the bottom of the page to download the report as a zipped file and view that report file in the browser.

- Now run the report file in the browser