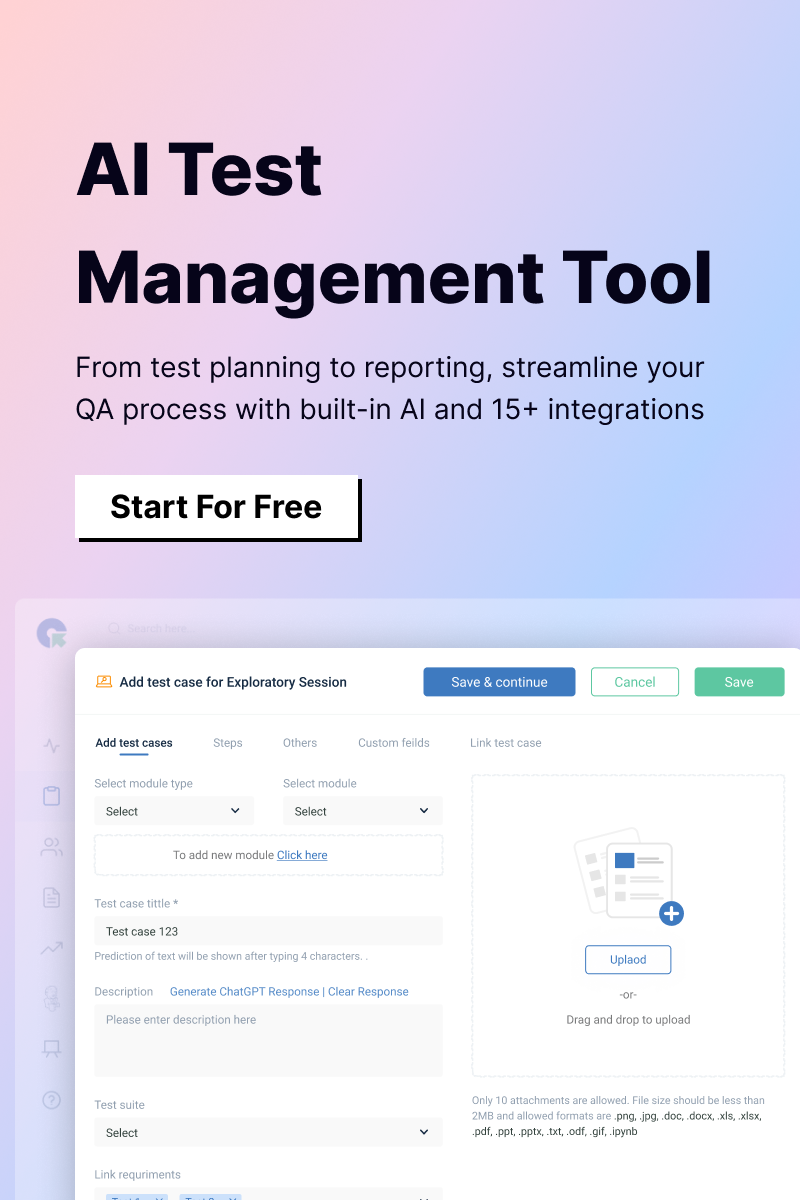
The day is finally here. After months of undeterred work, we are happy to announce our community that QA touch is now integrated with GitHub, a web-based hosting service for version control using Git, offering all functionalities of git as well adding many of its own, giving a clean web UI providing great visuals.
GitHub is a great way to handle and maintain code for a developer in the sense that it keeps everything organized with the ability to undo any unwanted actions. Which also allows push directly to servers so there is more consistency with that side of the transfer.
QA touch offers seamless integration with GitHub providing the best way to keep all the bugs posted in the GitHub Repository. GitHub can be integrated with QA touch in a short span of time, by following the below three steps:
- Generate the API Key (Personal Access Token) in GitHub
- Configure API Key of GitHub and the repository details
- Configure GitHub Settings
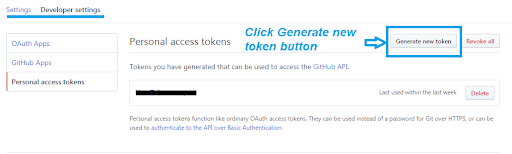
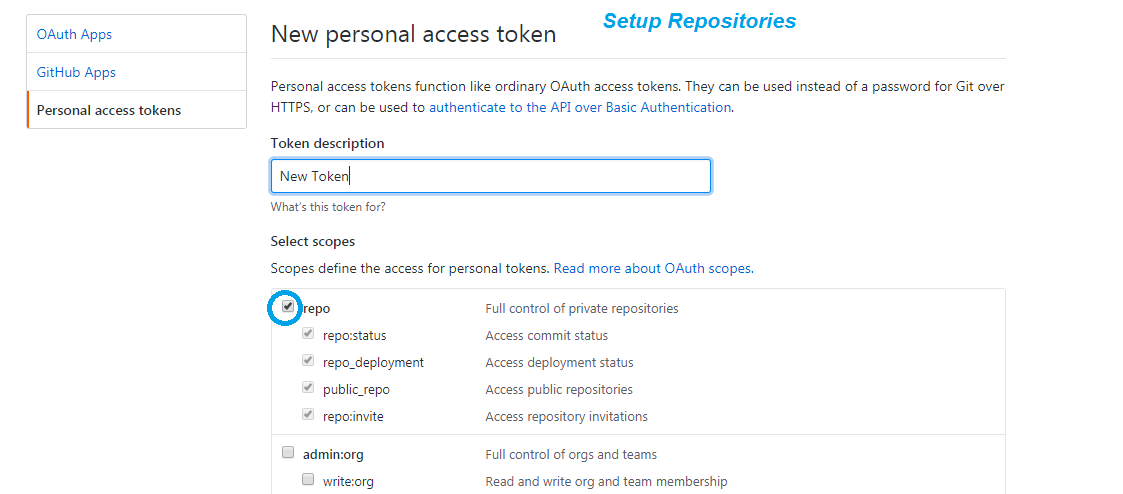
How to Generate API Key in GitHub?
You can generate the Personal Access Token from here and link the GitHub-API key in QA touch.
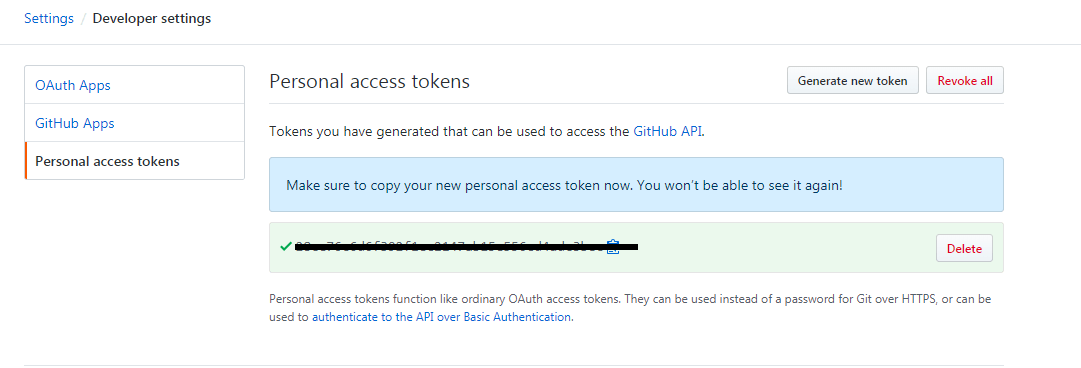
Step 1: Navigation (Personal Settings -> Developer Setting -> Personal Access Tokens). Click the “Generate new token” button.
Step 2 : Once the new token is generated, enter that token description and select the repo scope full control permission. After which, you can submit the button.
Step 3: Once that has been submitted, you will have personal access token generated successfully which should be utilized for further usage.
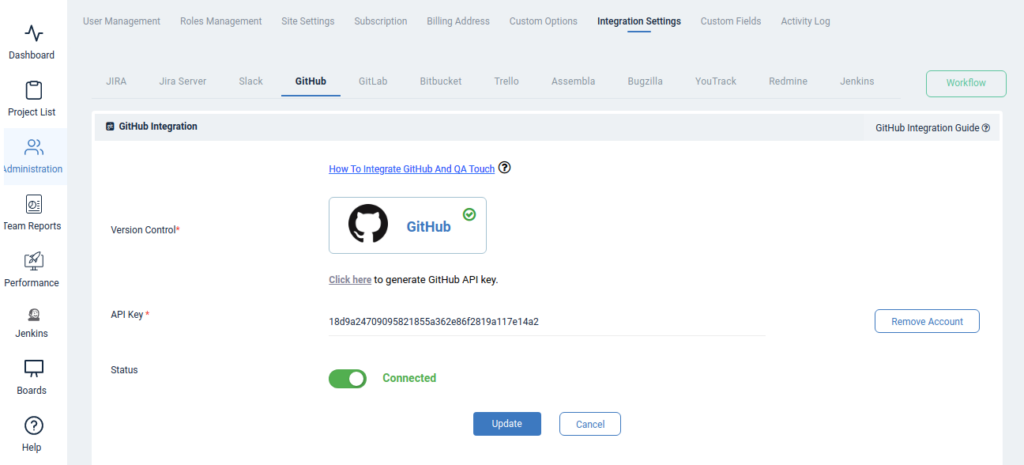
Configuring Global GitHub Settings
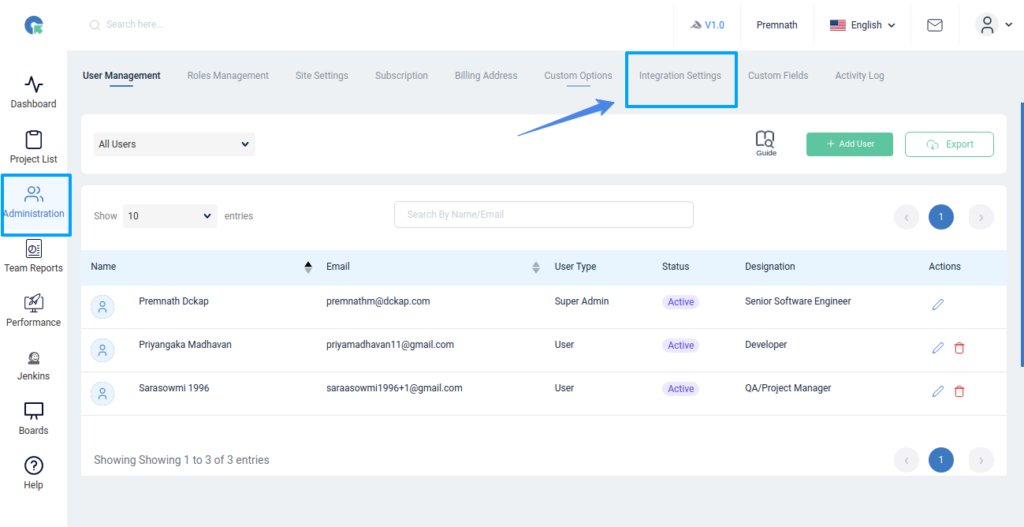
This settings configuration can be done by reaching out to the integration page. To reach the Integration page, go to Administration in the left navigation panel and click Integration Settings.
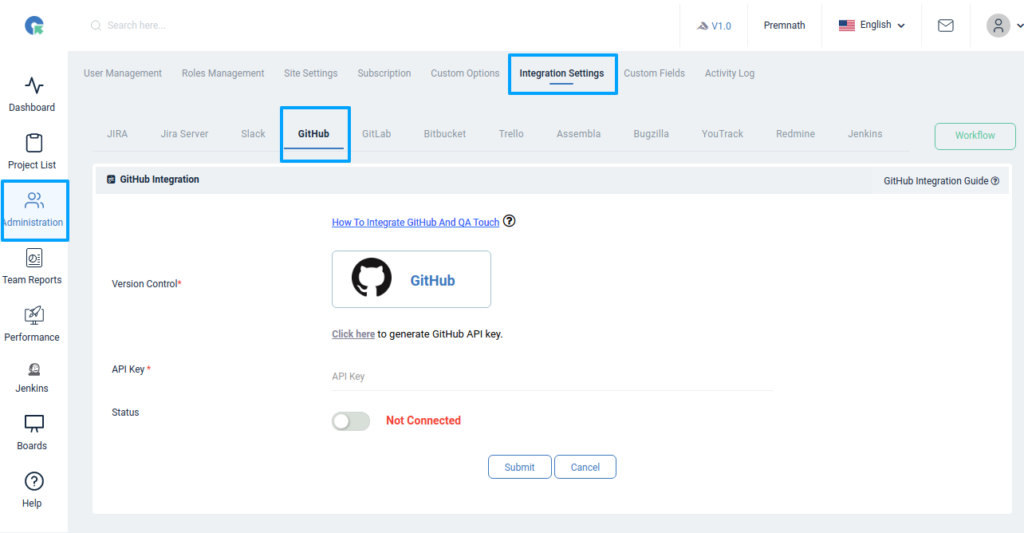
GitHub Global Configuration
Here’s the step-by-step guide one should be following for a successful and seamless GitHub Integration with QA touch:
- Login to QA touch as an Administrator
- Click the Administration → Integration Settings
- Enter the generated API Key
- Click Update
- After a successful configuration, the status becomes connected as shown in the below snapshot.
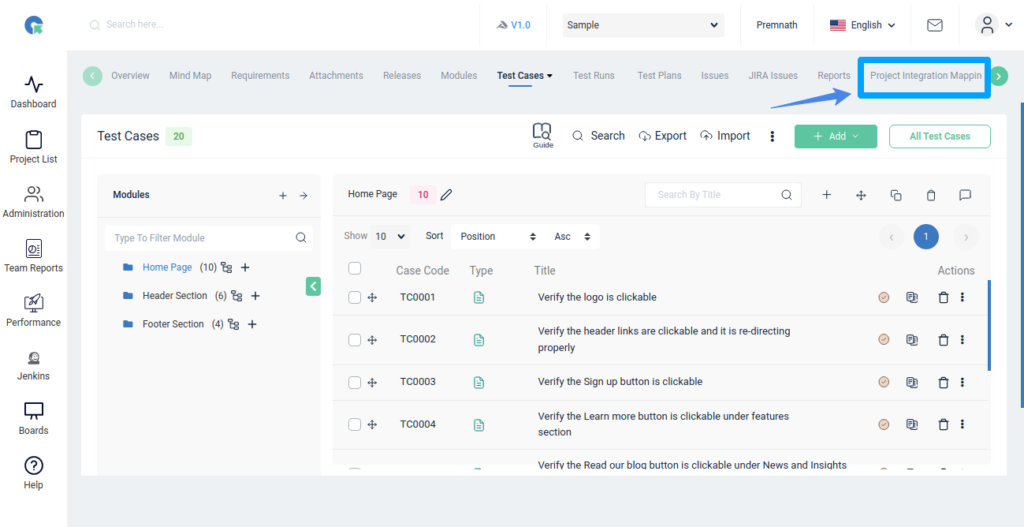
Mapping GitHub Repository to Project
Map the respective repository to the QA touch Project with bugs that are added in the repository.
- Click on Projects → Integration.
- Select a GitHub Repository and click submit to Map.
Have a look at the below screenshot for your reference.


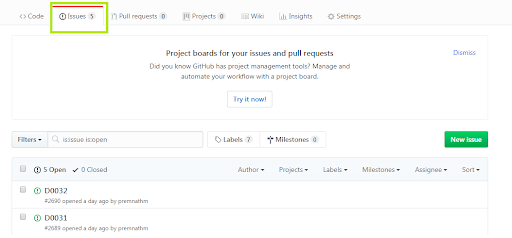
Snapshot of Messages Posted in GitHub by QA touch
Any bugs posted in QA touch will automatically be redirected to GitHub Issues tab after successful integration. A screengrab of the same is shared below on how messages are posted in GitHub by QA touch.
We hope this blog helped you to understand the process better of how integration should be done between QA touch with GitHub.
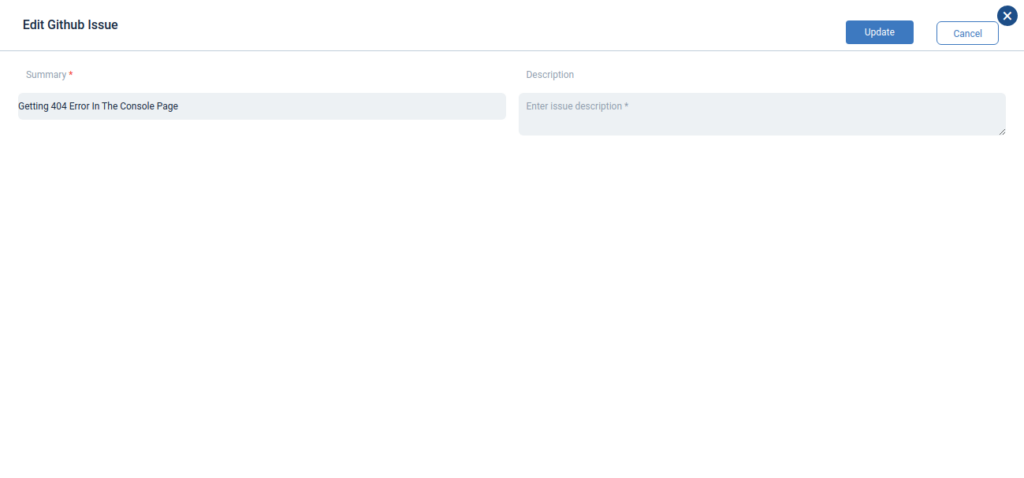
QA Touch offers 2-way sync with Github.
Attached Screenshot for your reference

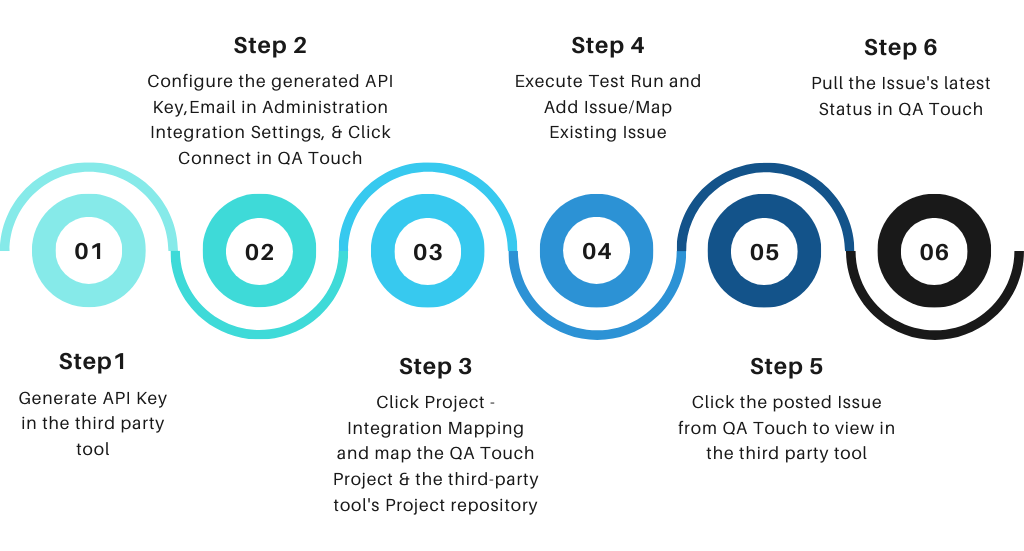
 Integration WorkFlow
 This integration is just the beginning of a lot more platforms which we are planning to collaborate within the near future to make testing accessible for all.
Register here and be the master of your application testing. Get a chance to use GitHub and many more which we offer.